photo about_zps9b9a046a.png  photo before_zps57f47fad.png  photo Untitled_zps486d62b9.png  photo recipes_zps93a1c386.png  photo tutorials_zps7aa74d09.png

October 28, 2016

Wishlist Wednesday - Sunny Weather Dresses, Please

It sure doesn't feel like it here - but Summer is just two months away.   A few lovely dresses that are ready for the warm weather!


The Colorblock.


The Maxi.
The Floral Sun Dress.


The T Shirt Dress.


The Vintage Beauty.


 Pin It

Wishlist Wednesday - Fresh


fresh (frsh)
adj. fresh·er, fresh·est
1. New to one's experience; not encountered before.


Two branches and some lights! Would love to do this in our bedroom.


This has been my motto for awhile now:)


Pin It

June 22, 2016

A Minnie Mouse Inspired ~ Free American Girl Dress Pattern


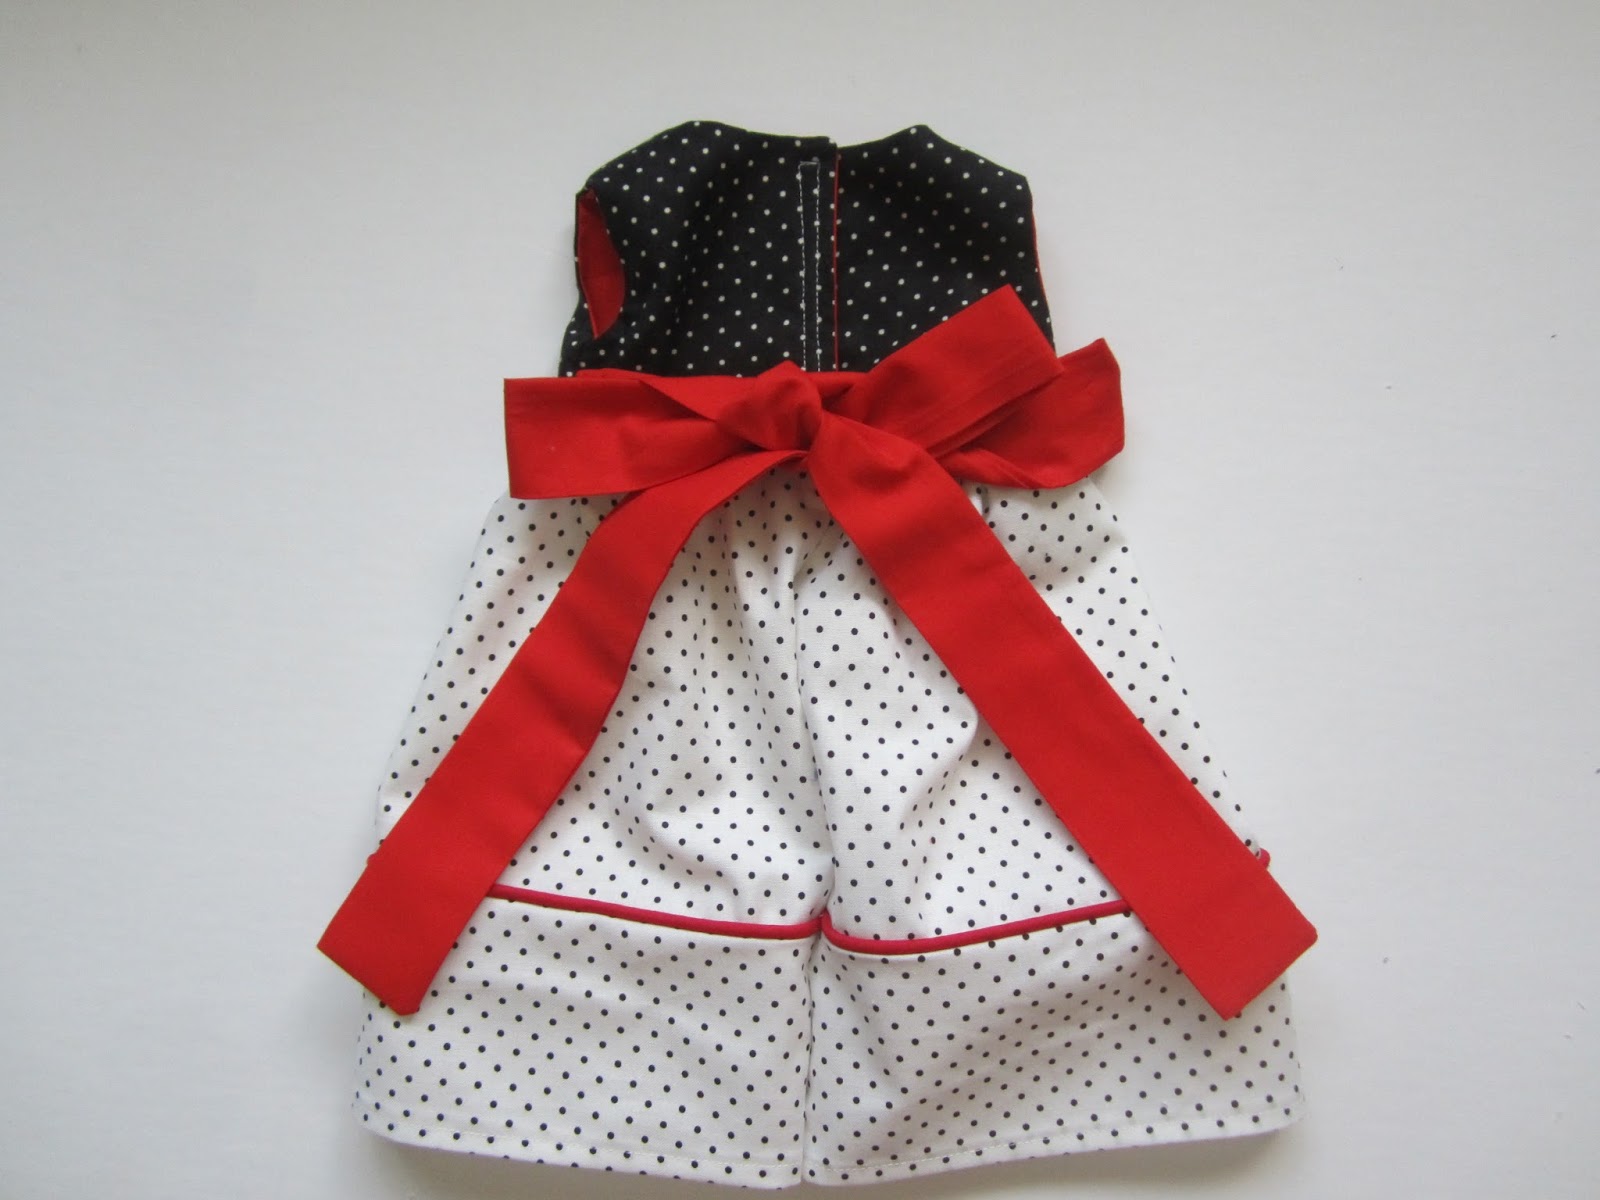
Today I am sharing a American Girl Doll pattern that I created.  The bodice is lined and sleeveless.  The gathered skirt is made of two sections of fabrics connected with bias tape.
I added a wide sash ~ think Minnie would like that!
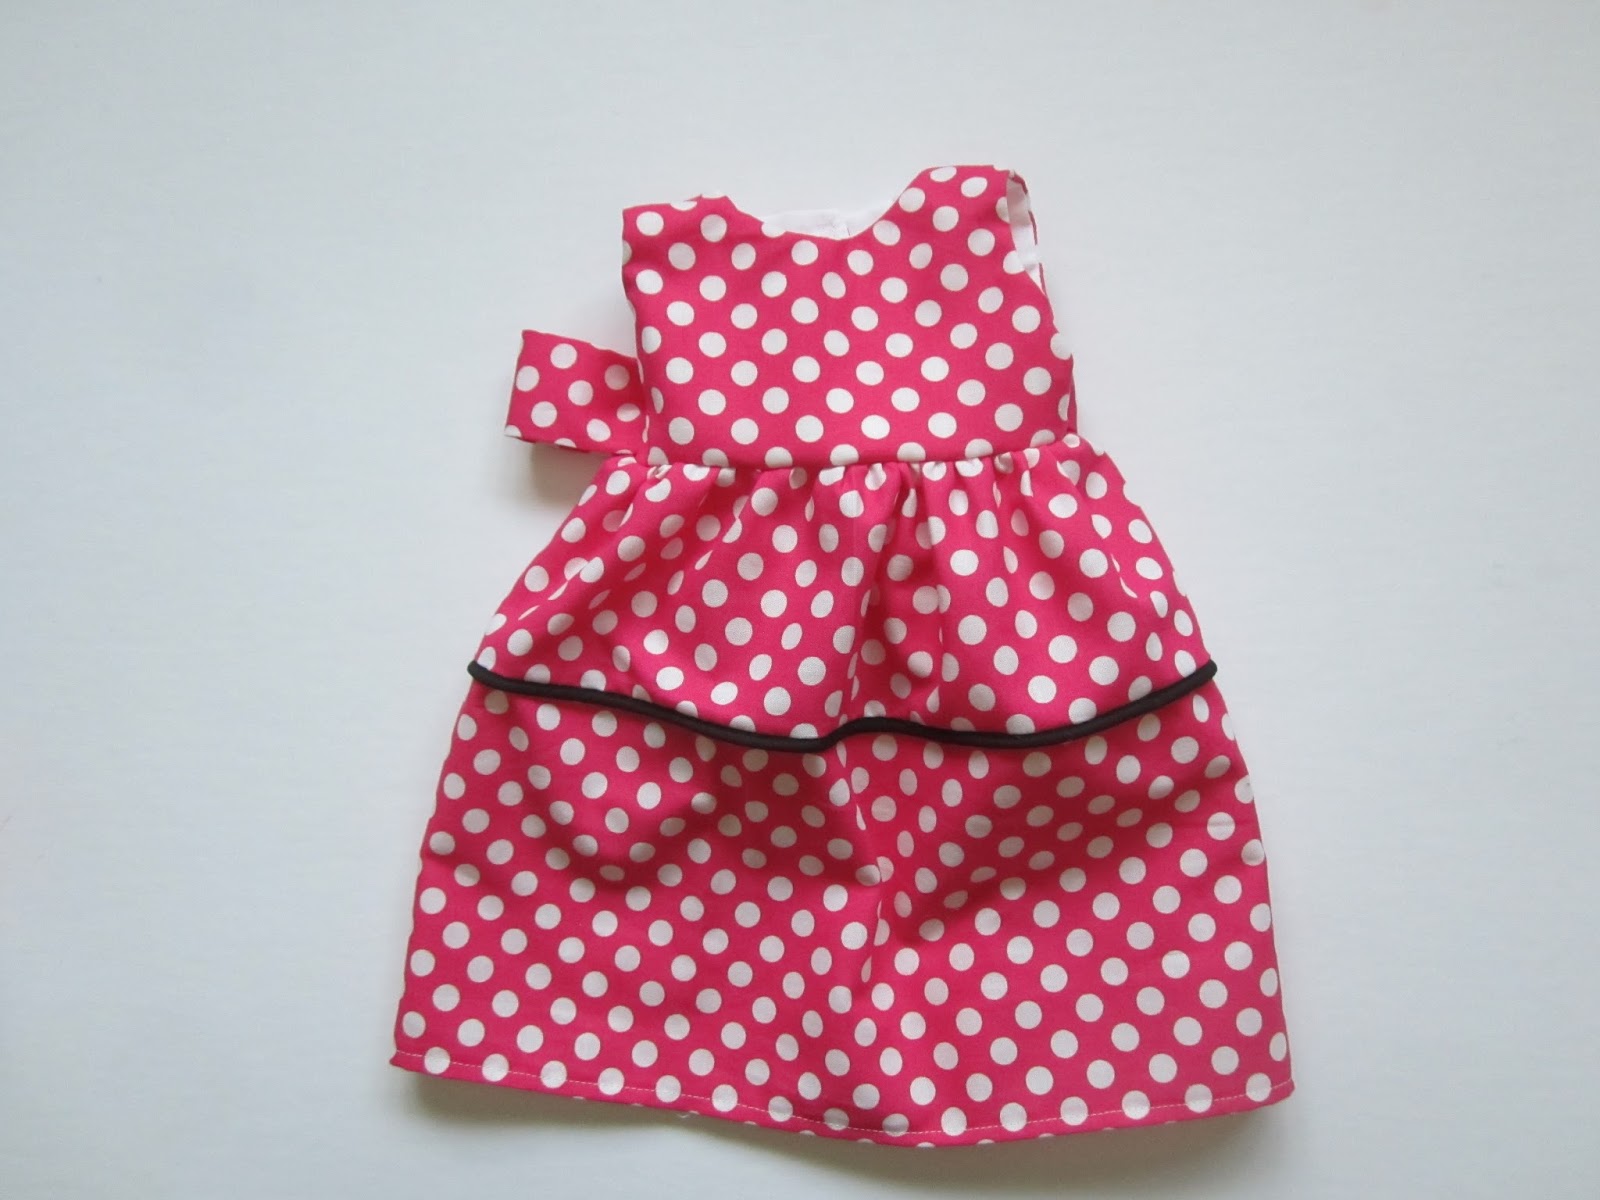
The hot pink variation of the pattern can be found at the bottom of the post.


Materials needed:
Dress bodice template
squares for main bodice and contrasting lining (red)
Two 3 1/2" x 22" contrasting fabric (red) for sash
One 6 1/2" x 28" rectangle for skirt top
One 4" x 28" rectangle for skirt bottom
28" length of bias tape maxi piping (red)
4" pieces of thin Velcro ~ I love this one

Optional applique:
Small free clip art of Minnie Mouse
Small square of Heat N Bond adhesive

Notes:
All seams are 1/4" unless indicated
Seams can be finished by serging, with a zig zag stitch, or pinking shears
Reinforce seams by backstitching 

Directions:  
Cut out the bodice pieces


Optional applique

Following the directions on the Heat n Bond package, trace your "Minnie."  Iron onto your fabrics.  Note: I show red for the bow, but I changed it to white with black dots to match the skirt.  Cut out your appliqué pieces, and iron onto the bodice,  sew (I use a zig zag stitch).


Bodice Construction:  With right sides together, pin and sew the shoulders.


Repeat for the lining.


Fold each sash piece in half right side together, and sew along the long edges and one of the short edges.


Turn the ashes right side out ~ I use a chop stick!


With right sides together, pin the lining to the bodice.  Stitch along the back and neckline, then around the arm holes.  Clip the seams.


Turn right side out by pulling the lining through the shoulder on one side.  Repeat on the other side.  Press flat.

Pull the lining out of the way.  Pinch the unseen edge of sash slightly to form a small fold.  Pin the sashes to the right side of the bodice, 1" from the bottom.  Baste in place.


Open up both the fronts and backs of the bodice.  With right sides together, pin the fronts together and the linings together.  Sew ~ catching your sash in the seam.


Turn right side out, and press

Skirt construction:
Pin your bias tape face down along the lower edge of the 6 1/2" x 28" piece.  Using your zipper foot, baste in place.


Place your skirt bottom piece face down covering the bias tape.  With your zipper foot, stitch as close as possible to the cording.


Your finished piece:


Press a 1/2" fold on either side of the skirt.


Hem the skirt bottom by pressing a 1/4" fold.  Then fold 1/4" again.  Press and top stitch.


Your dress pieces at this point:


Gather the top edge of the skirt by sewing long basting stitches ~ Remember to leave tails on your thread to pull.

Distribute the gather evenly.  With right sides together, sew the skirt to the bodice using a 1/2" seam.


Sew Velcro to the back of the dress.


Sew the back of the dress (below the Velcro) 7" from the bottom


Your Minnie inspired dress is complete!


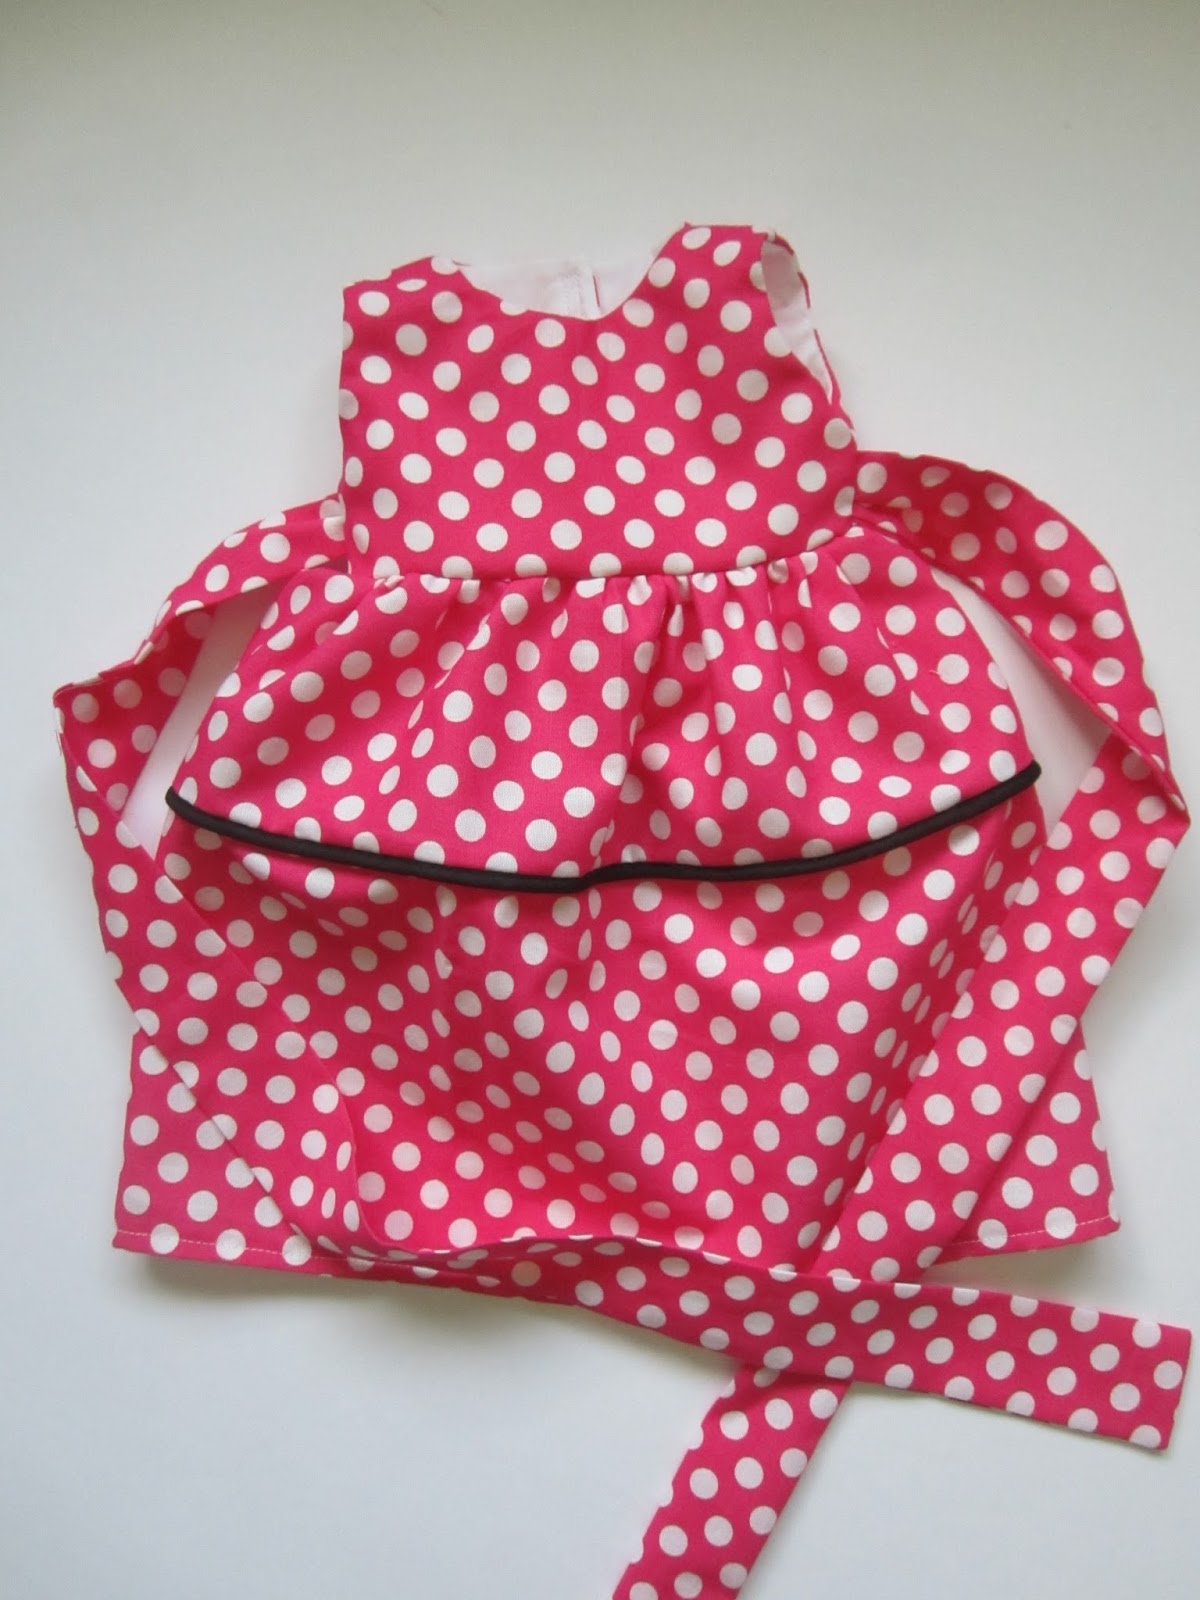
Hot pink dress variation

Omit the appliqué
Reverse the skirt pieces by sewing the bias tape to the bottom of the 4" x 28" piece


Pin It

June 20, 2016

Clothes for Bitty Baby

Recently I have posted some great patterns for an American Girl doll.  This past Christmas we gave my three-year old granddaughter a Bitty Baby, and "Baby," (her name appropriately) needed some new outfits!
I founds cute pdf patterns on Etsy and a couple of free ones on Pinterest.

A cute little Baby Sleep Sack ~ free pattern


A Yoke Dress with a Coordinating Bonnet


A Night Gown and Bonnet


A Dress and Romper


And, of course, baby diapers ~ many free pattern patterns available on Pinterest


And lastly a Wrap Dress with a Knot Hat


Pin It

June 13, 2016

Hole Lotta Fun ~ Children's Alternative to Corn Hole

Our family enjoys playing corn hole!  The games get intense and exciting, but the little ones often feel left out.  To solve the problem, Kendra created a game just for them.  She designed a board with three rabbits with large holes just waiting for bean bags to be tossed.  I must give Kendra's husband Scott credit for the construction.


Instead of square bags, this game required carrots!


The games was a huge success with my grandchildren showing the same competitive spirit as the adults.


Pin It

June 10, 2016

Summer Bucket List - End of the Year Craft

She is Back ...  at least for today's post!  With two busy little girls, Kendra has not had the time to write for our blog.  Hopefully, we will see a lot more of her creativity in the future!!

I'm one of the room parents for Layla's first grade class and for their end of the year party her teacher wanted a few summer-themed crafts for the kids to do.  I saw this Bucket List idea on Pinterest and decided to tweak it a bit to make it easier to print out and use.


All you'll need for this project is:
  • Colored Paper - I actually had the buckets and shovels printed at Staples since they had a huge variety of colors.  It also saved me from going out a buying a ream of paper when I only needed 50 sheets.
  • Scrapbook Paper - for the rim of the bucket.
  • Scissors - you will be cutting A LOT.  The shovels are especially fun: )
  • Ribbon - for the bucket handle. I used curling ribbon.
  • Stapler - to staple that ribbon on.
  • Printer - for printing out the bucket list, list!
  • Templates:  bucket, summer bucket list, shovels
Once you have all your templates printed and cut out you will staple one end of a small piece of ribbon to the top of the bucket.  Then "string on" the shovel by poking the ribbon through the hole at the end of the handle.  For this part make sure that the "good" side of the shovel is flipped over - the shovel template has a black line on it so you want the blank side of the shovel facing forward.  Then staple the other end of the ribbon onto the top of the bucket.


Scrapbook Paper Rims - cut same length as top of bucket.
Good Side and Bad Side of Shovel: )


This is the back of the bucket once the ribbon and shovel have been attached.

Once that part is together have the kids choose one of the scrapbook rims and lists.  These can then be glued on with a glue stick.  The rims should cover the staples.  Then they can have fun coloring and filling out the list.


Pretty simple and pretty cute!


Pin It
Related Posts Plugin for WordPress, Blogger...